
Best Primer for Old Wood Furniture: 2026 Guide
Table of Contents
- Why Old Wood Furniture Needs the Right Primer
- Primer Chemistries Compared: Oil-Based, Water-Based, Shellac, and Bonding
- How to Prime Wood Furniture Before Painting
- Choosing a Primer for Already Painted Wood Furniture
- Stain-Blocking Primer for Wood: Stopping Tannin Bleed and Old Stains
- When to Use Oil-Based Primer for Wood Furniture
- Primer Coverage, Cost, and Drying Times
- Conclusion
- Frequently Asked Questions
Last Updated: October 19, 2026
Why Old Wood Furniture Needs the Right Primer
Old wood furniture rarely offers a clean slate. Beneath that tired finish sits a surface shaped by decades of wax, polish, oil, and previous paint, and the primer you choose has to grip all of it. The best primer for old wood furniture is the one matched to what's already on the piece, not the one with the loudest label.
Primer is a bonding and sealing coat applied between the bare or previously finished wood and the paint. It creates the grip that keeps a topcoat from peeling, and it blocks the tannins and stains that would otherwise bleed through.
Here's the part most guides skip: a primer that works beautifully on bare pine can fail on a waxed mahogany side table. The surface tells you what to use. Below, we'll walk through the four main primer chemistries, how to prep old wood, and how to stop tannin bleed before it ruins a white finish.
Primer Chemistries Compared: Oil-Based, Water-Based, Shellac, and Bonding
Four primer families cover nearly every old-wood situation, but the labels on the cans don't tell you which one belongs on your piece. What matters is how each chemistry behaves on the surface you actually have: bare wood, a varnished top, a waxed finish, an old stained piece, or a previously painted surface. The comparison below is built around those conditions rather than around brand claims.
| Primer Type | Best For | Typical Dry-to-Touch | Typical Recoat Window | Cleanup | Main Trade-Off |
|---|---|---|---|---|---|
| Oil-based | Dense hardwoods, exterior pieces, heavy stain blocking, bare wood that needs penetration | 4-8 hours | 12-24 hours | Solvent (mineral spirits) | Slow dry, strong fumes, long recoat |
| Water-based | Bare and lightly finished wood, quick indoor jobs, low-odor work | 30-60 minutes | 2-4 hours | Soap and water | Can raise grain on bare wood; weaker stain block |
| Shellac-based | Knots, tannin bleed, odors, smoke damage, heavy old stains | 15-30 minutes | 45-60 minutes | Denatured alcohol | Strong solvent smell; short pot life |
| Bonding | Laminate, slick or glossy existing finishes, previously painted furniture, metal and glass trim | 1-2 hours | 4-6 hours | Varies by product (often soap and water) | Surface prep still matters; not a stain blocker |
Oil-based earns its place on dense hardwoods like oak and maple, on exterior furniture that faces moisture and temperature swings, and on heavily stained pieces where maximum blocking matters. It penetrates and grips where water-based primers can struggle. The trade-offs are real: slower dry times, strong fumes, and solvent cleanup. Plan the project around the longer recoat window rather than fighting it.
Water-based is the default for bare and lightly finished indoor wood because it dries fast, cleans up with soap and water, and keeps odor low in a garage or spare room. On bare wood it can raise the grain, so plan a light sanding with 220-grit after the first coat dries. It is a weaker stain blocker than shellac or oil, so don't rely on it alone over tannin-rich woods.
Shellac-based is the gold standard for sealing knots, odors, smoke damage, and heavy old stains, and it dries faster than any other family here. It demands good ventilation and has a short pot life, so pour only what you'll use in a session. It is also the most reliable barrier coat when you don't know what is on the piece.
Bonding primers are engineered for slick surfaces like laminate, melamine, and previously painted furniture where ordinary primer struggles to adhere. They are not stain blockers, so pair them with a shellac coat when old stains are present.
A quick decision path: bare or lightly finished wood goes to water-based or oil-based; a waxed, varnished, or unknown finish goes to shellac or bonding after a test patch; heavy tannin or old stains go to shellac or a stain-blocking oil-based primer; laminate and glossy paint go to bonding. The takeaway: match the chemistry to the surface, not to habit.
How to Prime Wood Furniture Before Painting
Good priming starts before the brush ever touches the piece. This workflow is built for old wood furniture specifically, where the finish on the piece is usually unknown and the surface has decades of wax, polish, and oil to defeat adhesion. Work through the steps in order; skipping a diagnostic step is how projects end up stripped back to bare wood.
- Clean thoroughly. Remove dirt, grease, grime, wax, and chalk with a degreasing cleaner. Old wax and polish are adhesion killers, and a cleaner alone won't remove a heavy wax layer. If the surface feels slick or waxy after cleaning, wipe it with a rag dampened with mineral spirits and let it flash off.
- Test the existing finish. Rub a small hidden spot with a rag dampened with denatured alcohol. If the finish softens or dissolves, it is likely shellac or lacquer. If it resists, it may be a hardened varnish or polyurethane. A second test with a drop of acetone on a hidden spot will soften most lacquers and many conversion varnishes. Record what you find; it determines the primer.
- Test for wax and polish. Wipe a hidden area with a white rag and a little mineral spirits. A yellow or brown tint on the rag means wax or polish is still present, and you need another cleaning pass before sanding.
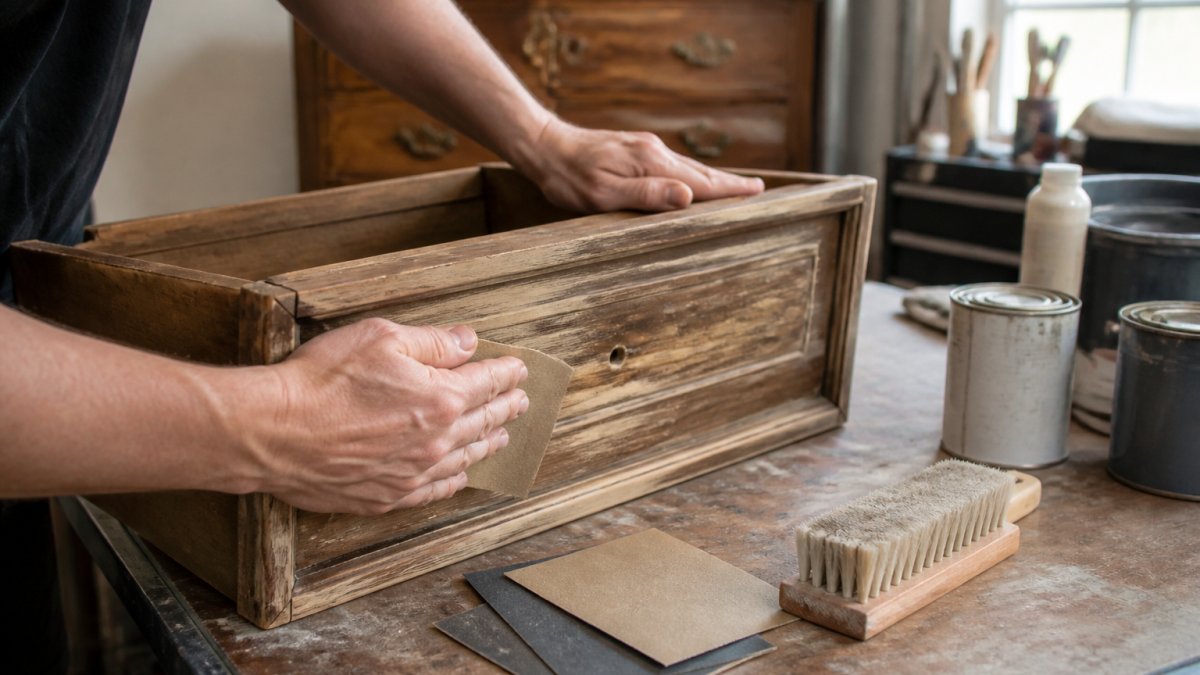
- Sand and degloss. Scuff the surface with 120- to 150-grit paper so the primer has a mechanical bite, then follow with 220-grit to smooth. Remove any loose or flaking paint by sanding or wire brushing. On veneered pieces, sand with the grain and stop as soon as the old finish dulls; cutting through veneer is permanent.
- Fill imperfections. Patch holes, cracks, and voids with a stainable wood filler, then sand smooth. Let filler cure fully before priming; trapped moisture under primer causes adhesion failure.
- Stir, don't shake. Stir the primer with a circular, lifting motion until uniform. Shaking traps air bubbles that show up as pinholes in the finish.
- Apply a thin, even coat with a quality nylon/polyester brush and a 3/8-inch nap roller cover. Thin coats bond better than thick ones and dry more evenly. Work in the direction of the grain on flat surfaces.
- Let it dry fully before recoating or topcoating. Follow the label's recoat window, and wait at least 24 hours after the final primer coat before applying the topcoat.
Temperature and humidity matter more than most guides admit. Most manufacturers specify application between roughly 50°F and 85°F with relative humidity below about 70%. Below 50°F, water-based primers stop coalescing and oil-based primers cure very slowly; above 85°F or in high humidity, dry times stretch and the primer can stay tacky. Bring the piece into a conditioned space if you can, and don't prime in an unheated garage in winter.
Choosing a Primer for Already Painted Wood Furniture
Already painted furniture is a judgment call: prime over the old finish or strip it? If the existing paint is sound, well-bonded, and free of peeling, you can often prime right over it after deglossing. If the paint is flaking, chalking, or lifting, strip or sand it back first. A bonding primer is the safer choice over a slick, glossy existing finish, while a shellac-based primer handles any lingering stains underneath.

Stain-Blocking Primer for Wood: Stopping Tannin Bleed and Old Stains
Tannin bleed is the brownish discoloration that seeps through paint on woods like oak, mahogany, and walnut, and it's the enemy of a white finish. A stain-blocking primer seals those tannins and old stains so they can't migrate into your topcoat. For stubborn stains, two coats with a longer dry window may be needed, since the primer must dry thoroughly to seal properly.
Our Stain Eliminating Primer is built for exactly this job: a bonding and stain eliminator in one, safe for furniture, cabinets, decks, walls, and concrete. It covers approximately 160 square feet per quart and dries to the touch in about an hour, with recoating in 4 to 6 hours under normal conditions. We suggest white under light colors, gray under medium tones, clear under dark colors or distressing, and dark gray under blacks.
When to Use Oil-Based Primer for Wood Furniture
Oil-based primer earns its place on dense hardwoods, exterior pieces, and heavily stained surfaces where maximum blocking and adhesion matter. It penetrates and grips where water-based primers can struggle, and it stands up to moisture and temperature swings better on outdoor furniture. The trade-offs are real: slower dry times, strong fumes, and solvent cleanup. Use it in a well-ventilated space, and plan your project around the longer recoat window rather than fighting it.
Primer Coverage, Cost, and Drying Times
Estimating coverage before you buy saves a second trip and wasted money. A quart of primer typically covers around 160 square feet, which handles a small cabinet or a couple of chairs. Drying and recoat times vary by chemistry: water-based and shellac primers dry fastest, oil-based slowest. Always follow the label's recoat window, and wait at least 24 hours after the final primer coat before applying the topcoat. Clean brushes and rollers in soapy water immediately after water-based primer so they last for the next project.
Conclusion
The right primer turns a fragile old piece into a finish that lasts, and the wrong one turns a weekend project into a strip-and-restart. Match your primer to the surface, prep thoroughly, and let each coat cure before moving on. Posh Brush Studio provides a curated selection of premium furniture paint, finishing supplies, and professional-grade brushes. We also offer blueprints ready for download at no extra cost, which provide easy step-by-step instructions. Shop Paint & Supplies and give your furniture a second life with confidence.
Frequently Asked Questions
Do I need to prime old wood furniture before painting?
Yes, in most cases. Old wood furniture often has bare spots, old finish, or stains that prevent paint from adhering evenly. A primer for old wood creates a uniform surface, improves adhesion, and blocks tannins or stains from bleeding through the topcoat. Skipping primer can lead to peeling, uneven color, or bleed-through within months. The only exception is if the existing finish is sound and you are using a paint-and-primer-in-one product, but even then a dedicated primer gives more reliable results on aged wood.
What is the best stain-blocking primer for wood with tannin bleed?
Shellac-based and oil-based stain-blocking primers work best for tannin bleed, especially on woods like oak, mahogany, and cedar. Water-based stain-blocking primers can also work but may require two coats. Look for a primer labeled specifically for stain blocking and tannin blocking. Apply two coats if the stain is severe, and allow proper dry time between coats. A clear primer under dark paint or a white primer under light paint helps prevent tannins from discoloring the finish.
Should I use oil-based or water-based primer on old furniture?
Oil-based primer for wood furniture offers strong adhesion and stain blocking, making it a good choice for bare, weathered, or stained wood. It has a longer dry time and requires mineral spirits cleanup. Water-based primer dries faster, cleans up with soap and water, and has lower odor, but may need two coats for stain blocking. For most indoor furniture projects, water-based is convenient; for heavy stain blocking or exterior pieces, oil-based is more reliable. Choose based on the condition of the wood and your ventilation.
How much does it cost to prime old wood furniture?
Our Stain Eliminating Primer covers approximately 160 square feet per quart, enough for a dresser, nightstand, or small cabinet. It costs $44.99. For a single furniture piece, one quart is usually sufficient. Factor in sandpaper, brushes, and cleanup supplies, which add $10 to $20 for a small project.